In this blog series “How to Improve Website Speed” we’re going to discuss some of the easy quick steps you can take to improve the page loading speed of your website. As website speed is now a key ranking factor for Google, when it comes to deciding how important your website is, making sure your website is fast is essential.
How Do I Check My Website Speed?
Once you’ve decided to improve your website speed, the first step you should take is to establish the currently page loading speed of each page in your site. This will show you how much room for improvement you have, as well as giving you a baseline to see your progress. Remember each page will be different, and whilst it may seem overwhelming at first, the principles and methods are the same for most pages/posts. Start with your homepage and then move on to the most important pages of your site. If you don’t know which are the most important pages, then take a look at your Google analytics data. The pages with the most visits, and the pages you’d like to have the most visits, are the best places to start.
Thankfully there’s many free tools online to help you discover your website page speed. We would recommend using a few different tools. Each tool has its strengths and weaknesses, if you rely on only one tool, you may miss things that other tools will show you. Most of them use the same technology, but they’ll present the data to you in different ways.
Google Page Speed Insights
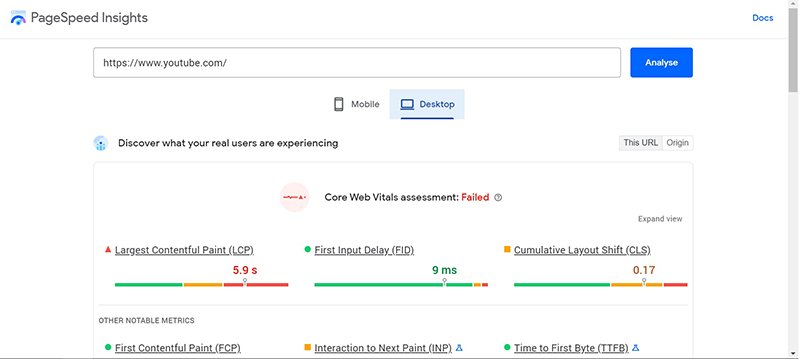
Visit the link above and insert the URL (web address) for the page you want to analyse in the search box and hit “analyse” You can check your results for both desktop and mobile by clicking on the little icons. You’ll be given a score out of 100, don’t expect anywhere near 100, as very few sites achieve this, unless they focus heavily on speed. As you can see from the screenshot below, even YouTube doesn’t score perfectly. However you should be aiming for a score above 80, this can be difficult to achieve, particularly on mobile, but as you’ll see the tool will show you a list of steps to focus on (called opportunities) in order to work towards this. Often images are the top of this list, hence why we’re discussing images in this blog.
Pingdom
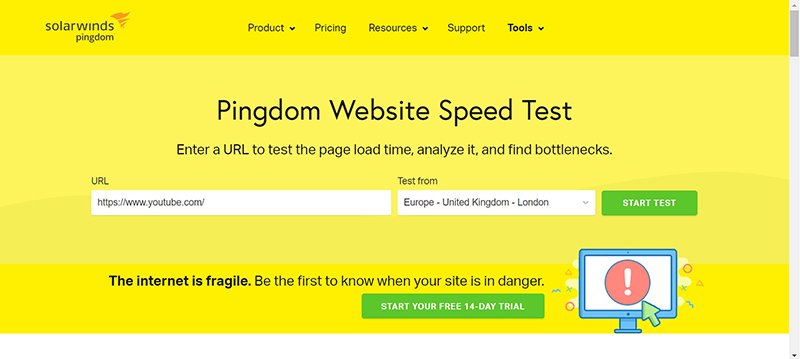
As you can see from the screenshot above, the first obvious difference with Pingdom is that you can set a location to simulate where the look-up is being conducted from. This can make a big difference if you’re serving content to a global audience and want to make sure your page speed is the same for everyone. That’s a bit more advanced so we’ll discuss in later blogs. For now you can see the results are similar to Google Page Speed Insights, but also slightly different.
GT Metrix
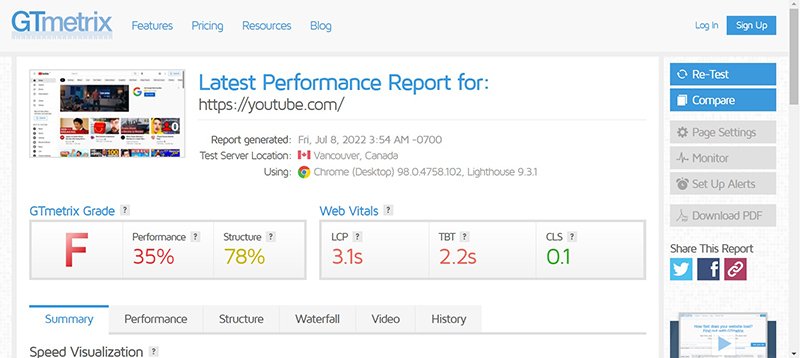
Again GT Metrix allows you to choose the test server location, but it’s a bit more hidden as an option and also you need to quickly create a free account in order to choose a different test location. This is important if you’re not in the default location that GT Metrix uses (Vancouver, Canada in the screenshot above). So it’s worth creating an account so you can set the test location to where your customer base/audience will be.
Do Images Really Affect Page Speed?
Yes! Images are one of the most data-heavy things your website will have to serve to the end user. As there’s hardly any websites without images anymore, this will most likely be very relevant to your website and as most people don’t think about image sizes/file sizes when they add images to their site, it’s usually the most important.
How Do I Know If I Need To Optimise My Images?
So this is where Google Page Speed Insights is great, it actually shows you all the images where you could make data savings. Every image file has a size, usually in kilobytes (KiB), Google call this “resource size” and then it will show the potential savings you can make. See screenshot below:
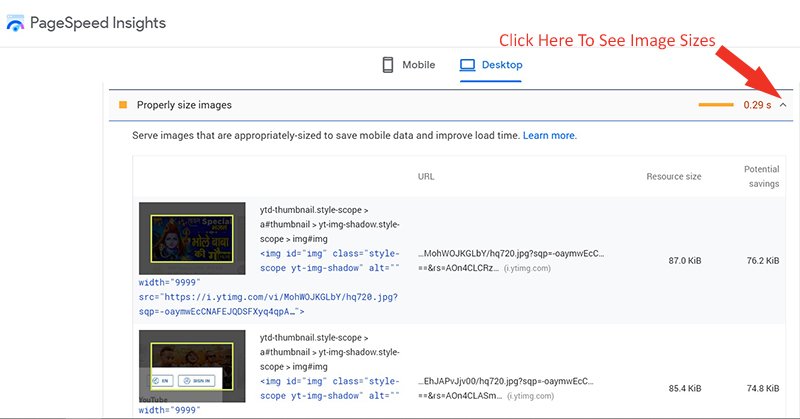
For this specific YouTube example, we’re only looking at data savings of maybe 10 KiB, which in the overall picture of things is negligible. However many of our client sites, that we’ve helped to speed up, may have had images that were originally ten megabytes (that’s 10,000 KiB). It’s very unlikely that an image needs to be that large and so reducing that particular file size would make a significant difference. Now imagine doing that for all your images on your entire website!
It’s also fairly safe to assume if you had photos taken for your website and didn’t resize them yourself before uploading them, they’ll be much larger than necessary.
How Do I Optimise My Images?
Option 1 – Do it manually
So the “belt & braces” approach would be to manually optimise all your images and re-upload them. Depending on your website framework/build, this may also be the only option available. There’s two steps to this process, although some tools, such as Photoshop, allow you to do this at the same time.
Step 1 – Resize the images
You’ll need to open the images in an image editing software, such as Adobe Photoshop or Microsoft Paint and resize them. Take into account what the images are being used for and resize them to an appropriate size. So, for example, you wouldn’t resize a big main header banner that’s currently 1920 x 800 pixels down to 300 x 125 pixels, because this would result in the image looking terrible on a screen that’s larger than 300 pixels wide (even most mobiles nowadays). However if you had a “meet the team” headshot image thumbnail and you had a grid of twenty team members, five to a row, then you most likely reduce those images down to about 200 pixels wide. This is where you have to think what the images is there for and what’s the smallest it can be whilst still doing its job effectively.
Step 2 – Compress the images
There’s two main types of image compression. Lossless and lossy. Lossless image compression can help reduce the file size of an image without any real noticeable difference to the human eye. It’s less aggressive, but also means you won’t gain as much file size reduction. Lossy image compression, will mean the difference can be noticeable, but you can potentially reduce the file size much more. This is a balancing act between how you want your images to look, versus the speed of your site. If you were a wedding photographer presenting a photography portfolio, then lossy compression probably wouldn’t be for you. However, if you had a plumbing parts wholesale business, then you probably won’t care as much about the quality of your images. Image compression can be done with image editing software and there’s even free online tools. One big thing is image format. Google are now heavily pushing their compressed image format (webP). This offers great savings on image files sizes, however it’s not compatible with all (especially older) browsers. Also if you want your images to be easily downloaded and shared, then this is not a good option.
Option 2 – Use a Plugin or App
Depending on your website framework, you may be able to use a plugin or app to do this job for you. This can save a lot of hassle, but you’ll have slightly less control of the exact file size for each image. As a general efficient approach, this is normally the best option for most people. If your website is a WordPress site then we recommend the following plugins: Imagify, reSmush.it, Jetpack & EWWW Image Optimizer. Most of these plugins have a free version that will get you started, but you may need to pay, depending on your website. Once installed, go into the plugin settings and make sure you set it up correctly for your goals, then run it and once completed check on Page Speed Insights to see the difference.
There is an option three as well. You could ask someone else to do it for you! We’ve successfully performed image optimisations for many sites so take all of the work out of it for you. Whatever you choose to do, at least you have taken one of the biggest steps forward in increasing your page speed. Once you’ve optimised all the images on your site, going forwards, remember to set-up the good habit of only uploading images the minimum viable size. This will mean no more mass image editing and your site will stay faster. Of course if you use a plugin and have it running automatically, then you probably won’t need to worry, but it’s still worth checking your page speed insights occasionally, to make sure no images have been missed.